Let's get you started
1.
Sign up & Sign in
2.
Request a subscription
Once you're signed in, you can now request a subscription to one of our Products.
At the moment, we have a single product we're proposing for our clients and it's called REALvision Cloud Slicer.
Without a subscription, you can't use any of our APIs.
First:
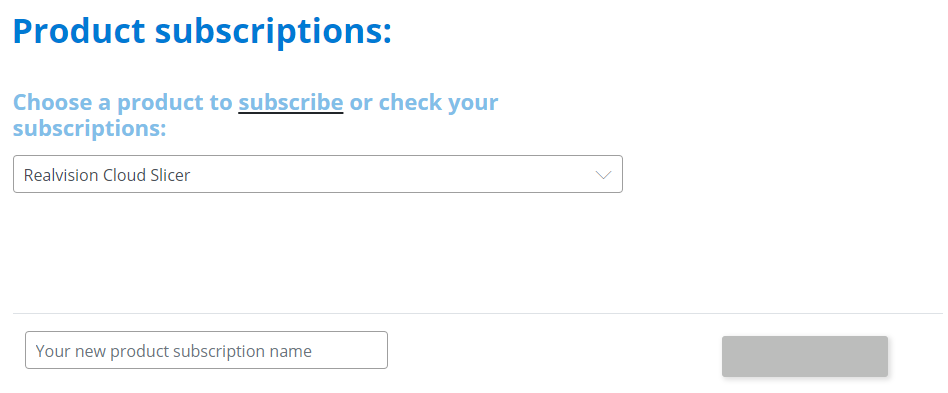
In order to request a subscription:
Choose a product you want to subscribe to in the drop down list below.
Right now, you don't need to, we only have one product.
Then:
Give your subscription a name, example: My Subscription.
You'll notice the button on the left changed.
Click on it to request a subscription.
3.
Wait for approval
Now that you have requested a subscription, our team will review your subscription request and approve it as soon as humanely possible.

4.
Congratulations!
If you're at this step, it means your subscription request has been approved and you received an email with detailed instructions on the next step.
Congratulations, you now have access to our APIs.
5.
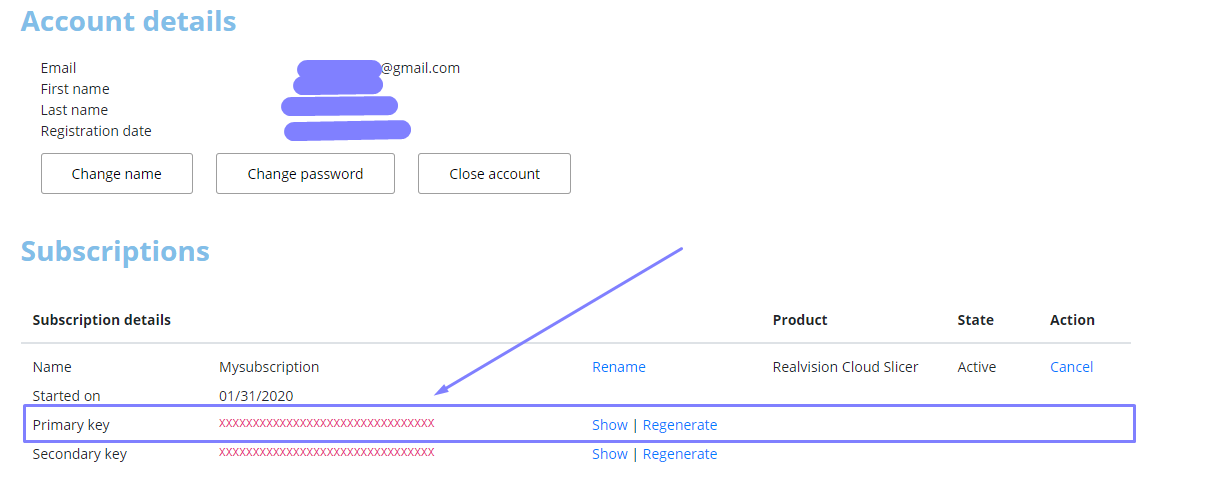
Get your API Key
Having a subscription means having an API Key you can use to authenticate your API requests. If you followed the instructions in the email you received, you'll know that you can get the API key in your Profile.
If you go to your profile, you'll see all your subscriptions. You'll also see the API Key of each subscription. Now, you know where to get an API Key, but where do you use it?
6.
Try the API (Part 1)
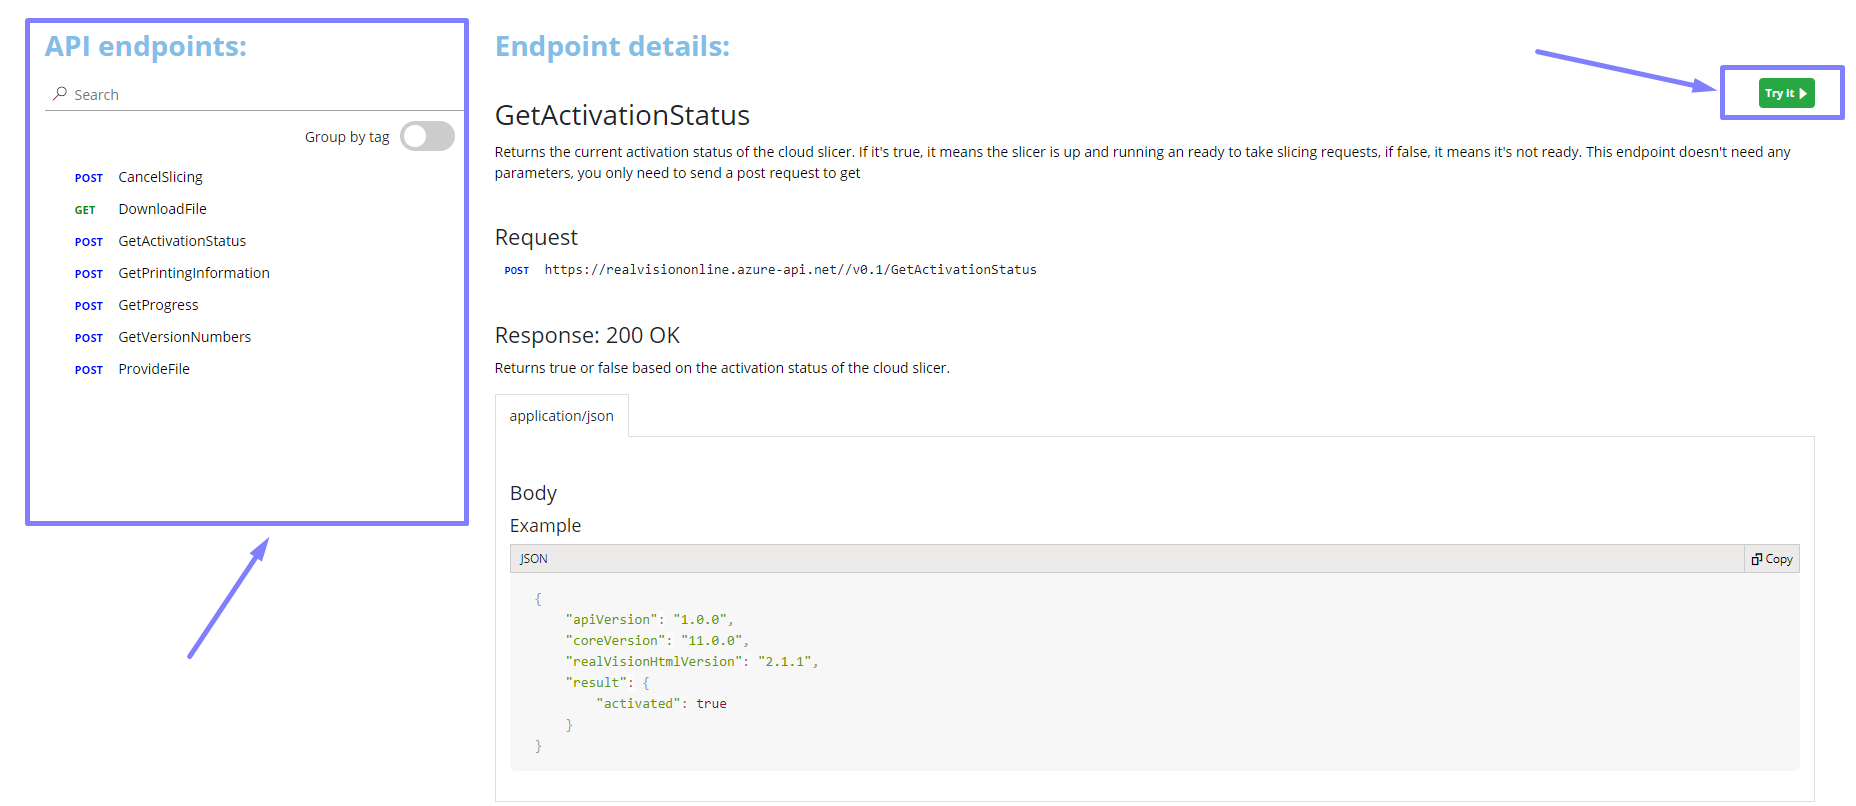
Head to the APIs page and choose the API you want to try from the list. You'll be redirected to that API's Sandbox where you can try the API, the Sandbox is an online test environment we provide you with so you wouldn't have to build your own from scratch just to test our APIs.
Take a look at the interface below, you have three things you should notice:
01. The API endpoints list: it's a list of all the endpoints that API has, click on POST /GetActivationStatus endpoint for example.
02. You'll see that details are displayed for that endpoint about the Request along with the Response.
03. You'll also see a green button called try it on the top right corner, when you click on it a sidebar pops out from the right. (More details on that in the next step: Try the API (Part 2) )
7.
Try the API (Part 2)
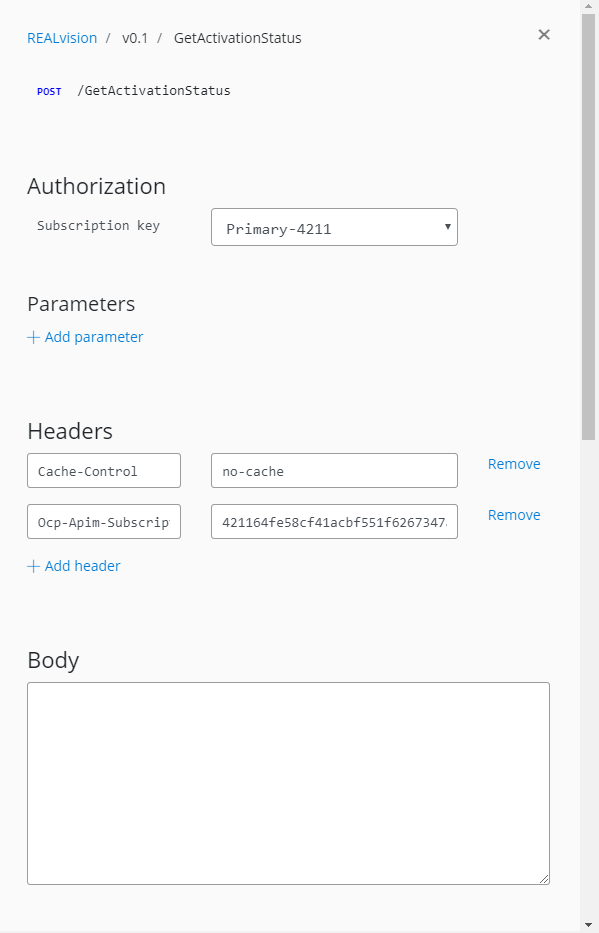
The sidebar that popped from the right has everything you need to test the API endpoint:
- The Subscription Key is automatically filled in for you.
- You can specify any Headers you need.
- You can fill in the body of the request.
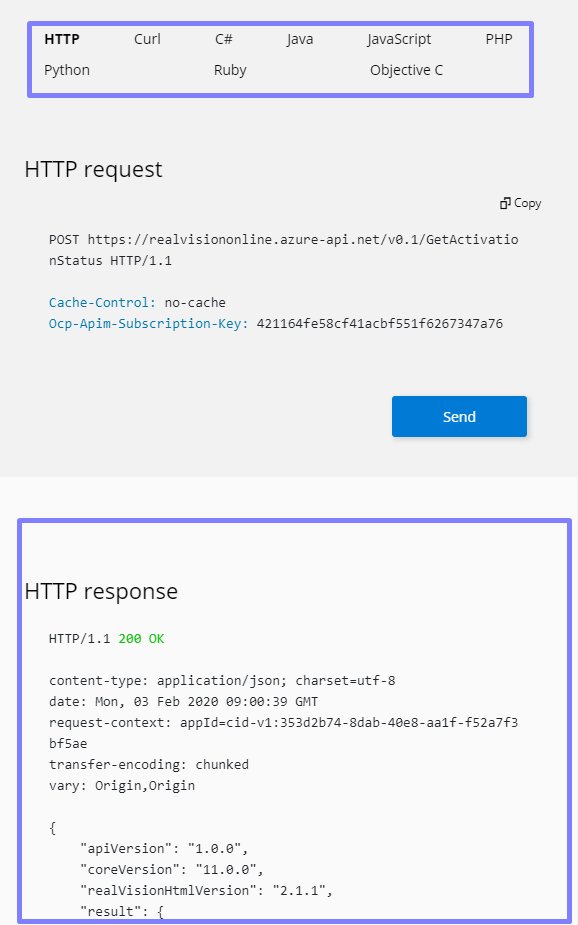
- You can see how to send that particular request in several programming languages.
- You can Send the request and get a response immediately, by clicking on the Send button.
8.
Bonuses
If you want more details, feel free to give our documentation a good read.
As a bonus, we have Sample Applications for you to get you started on using our APIs in C# and Nodejs along with tutorials on how to do so in the documentation.
We also have a Postman collection you can just download and start testing using Postman.